Unlocking the Essentials: My Journey to Amateur Astronomy
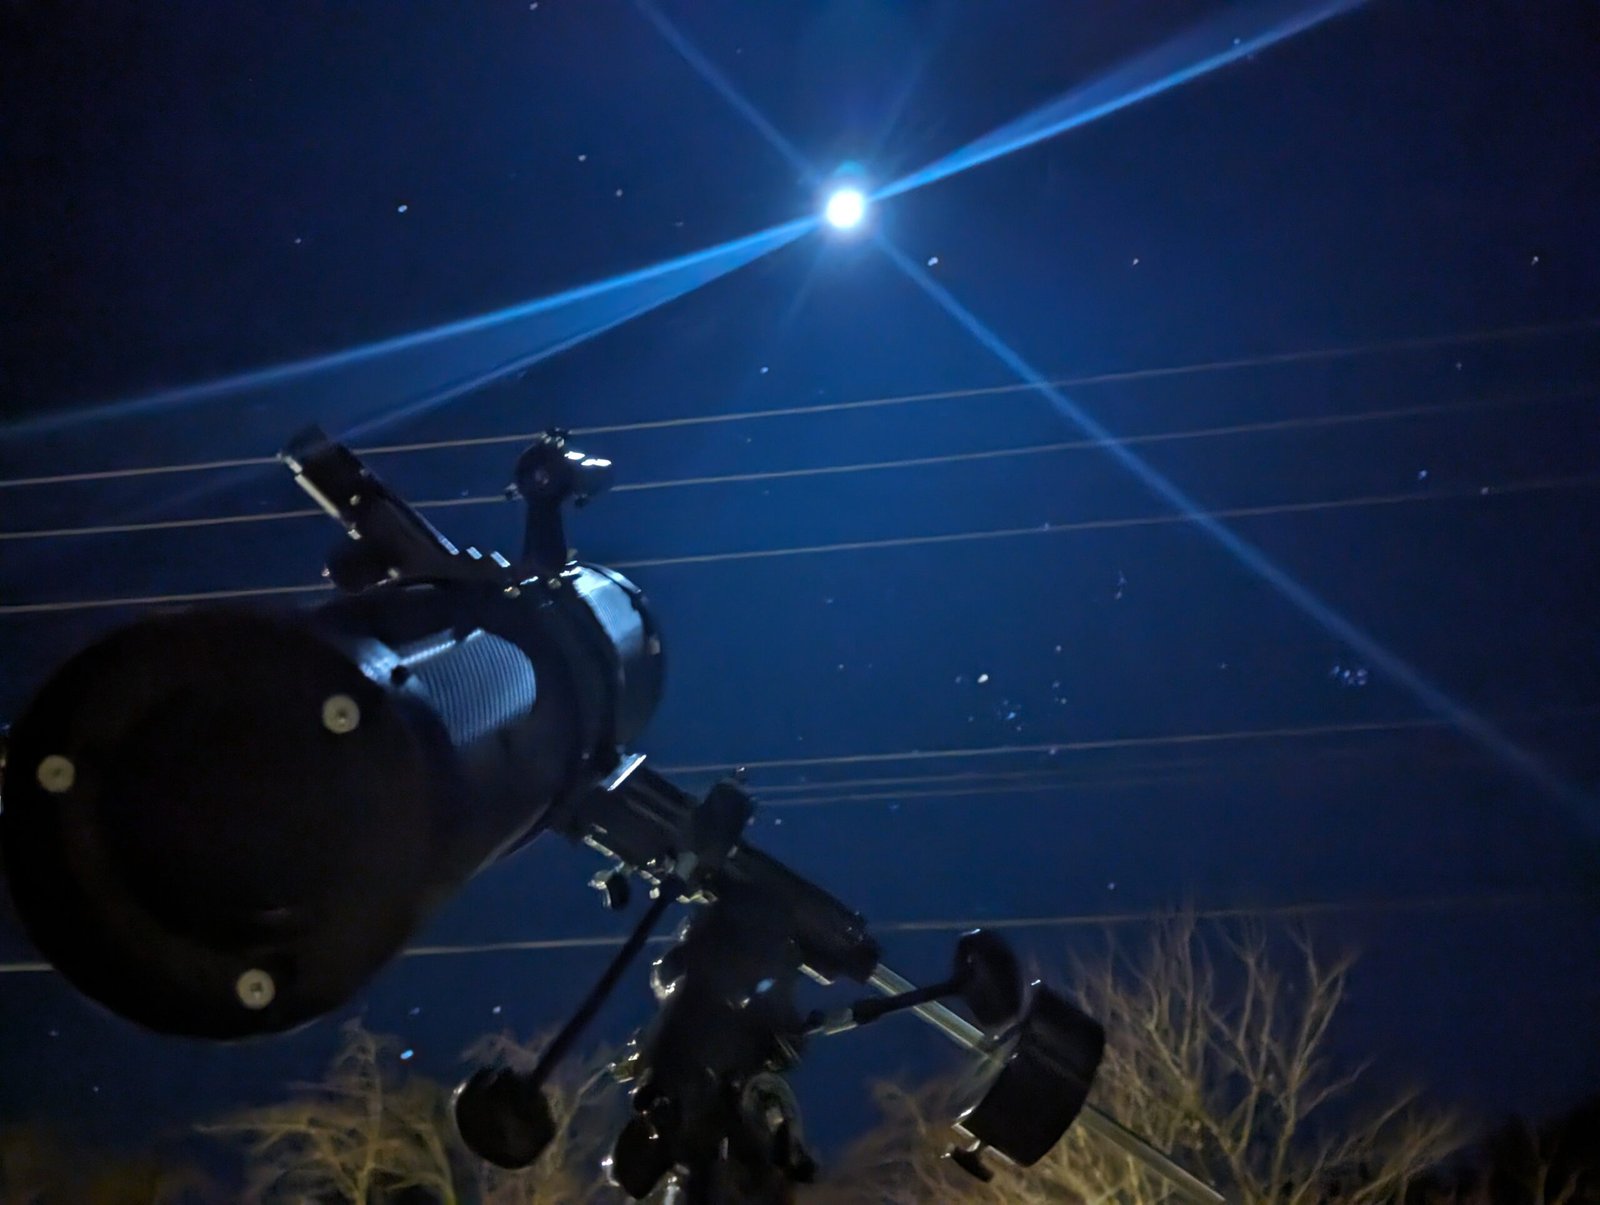
I have sequestered my desire to observe the night sky for long enough. It has been many years that i’ve yearned to possess a tool to magnify my vision. To observe the surface of our moon and the glimmer of other moons. My first ever telescope is one of the cheaper ones, a 130EQ reflector telescope by Solomark. I’ll admit the quality of my telescope mat be lacking, but there’s a very good chance I simply suffer from operator error. To be sure, it is in this series of articles that I will archive my humble beginnings in stargazing and share my findings. So let’s start with unlocking the essentials together in my journey to amateur astronomy.
Part I will introduce you to the different types of:

Types of Telescopes
We have three main types of scopes:
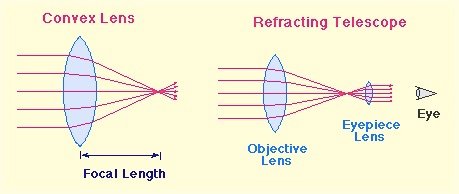
• Refractors – Used by Galileo Galilei himself, these telescopes operate on the principle of refraction! Go figures. Refraction is the term used to describe the bending of light as it passes through material. Think Pink Floyd’s Dark Side of the Moon cover, the prism will bend light differently than with a convex lens. The convex shape is what’s used for refracting light in refactor telescopes, shown below.
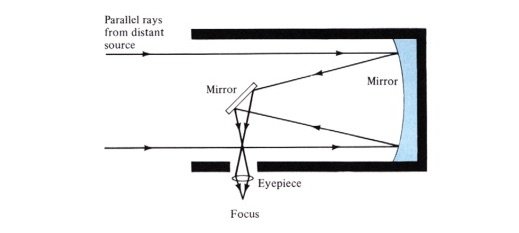
• Reflectors – Invented by Isaac Newton, it’s often called the Newtonian telescope. It works on the principle of reflection. So instead of bending light with lenses, we are now redirecting it with mirrors. Like when you find yourself questioning your entire existence at a fun house looking at yourself in a warped mirror. The shape of the mirror surface is redirecting the light abnormally, making you look…different. The shape of the mirror used for reflector telescopes is concave, shown below.
• Combo or Catadioptric – Which uses both refractor and reflector principles. Set up very similarly to a reflector telescope with its concave mirror, but with the light first passing through a lens called the glass corrector lens which reduces the amount of spherical aberration. This optical aberration is from performance deviations from spherical (concave) mirror/lens surfaces. The corrective lens bends the light a little to assist in allowing the concave mirror to image light at infinite distances.

Types of Mounts
There are two main telescope mounts that I will focus on. The others are more refined versions of the two for more specific parameters in astronomical observing. Mounts support the weight of the telescope and in most cases assist in the movement of them. The extent to which they move is what differentiates them.
• Altazimuth mounts – These mounts move in two axis, either altitude (up or down) and azimuth (side to side). Alt-Azimuth. They’re a simpler design, used primarily for the earlier telescopes and by hobbyists as it was cheap and easy to DIY. They’ve made a resurgence recently with digital tracking. The plug in and point method doesn’t require a mechanically driven device to rotate the telescope equatorially for tracking.
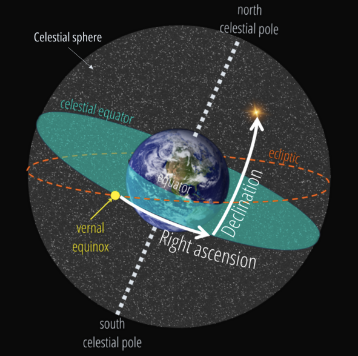
• Equatorial Mounts – These mounts operate by setting one axis in line with the equatorial axis (known as the the right ascension, the celestial equivalent of longitude). Paired with a second axis of motion at a right angle to it (known as the declination, the celestial equivalent to latitude). Together they allow tracking and finding by the use of coordinates. (Article dedicated to this mount is coming soon)
The Specifics of Eyepieces
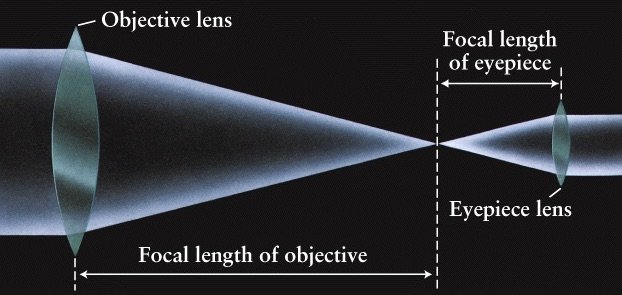
The eyepiece allows you to inspect the image created by the telescope. Imagine the focal point, the point at which the light of the telescope refracts or reflects to the same point to form an image. The eyepiece sits just past the focal point to observe the image under more magnification, like a magnifying glass. Here are some points to understand about them so you may one day venture into boosting your telescope game.
Sizes – There is a standard diameter that most telescope focusers will fit which is 1.25″ (31.7 mm). But there are ones with the intention of having wide views with a 2″ (50.8 mm) diameter. You’ll rarely find smaller ones but they are around so just be sure you are aware of the size you need.
Focal Length – The magnifying power of the eyepiece is directly related to it’s focal length. This is why some astronomers state the focal length rather than the magnification. The magnification is determined by dividing the telescopic focal length with the eyepiece focal length. So for instance, in correlation with a telescope that has a length of 1100 mm and an eyepiece with a length of 11 mm, that would equal 100x magnification.
(Magnification = Focal Length of Telescope / Focal Length of Eyepiece)
Magnification – Now there is such a thing as having too much magnification. The most common rule of thumb suggests to not exceed a magnification greater than about 50x per inch of aperture of your scope. When choosing an eyepiece, the amount of magnification or focal length should suite your needs. The greater you go, the more susceptible you are to the steadiness of your platform, the viewing conditions and the overall quality of your scope. For a beginner like myself, I will stick with what came in my kit.
Expanding with the Universe
This is a good start, but let’s go further! Stay tuned for Part II where we will try to understand how the stars are mapped and how we can find them. As well as how to use our telescope to coordinate with the coordinates! Also, if you’re a fan like me, you may be interested in reading my article on SpaceX’s Third Starship launch – check it out here! Thanks for joining me in my journey to amateur astronomy
[…] begun my journey to achieve amateur astronomer status! Follow my progress by checking out Part I here of a small series i’m doing to help myself and hopefully others in gazing at the stars […]